Creative Minds 𖹭 Happy Hearts

Building a Model of the Brain from Clay, Labeled by Lobe
Six brain regions, five colors of clay, and one worksheet that turns anatomy into something your student actually touches: building a model of the brain from clay makes lobe locations stick.
Building a model of the brain from clay walks students through identifying and sculpting six major structures: the frontal lobe, parietal lobe, temporal lobe, occipital lobe, cerebellum, and brainstem. Each region gets its own color, recorded in a two-column table before the build begins. A six-step procedure guides your student from studying the reference diagram to labeling parts with toothpicks or small flags, then comparing the finished model to the diagram. The sheet closes with a freehand drawing section and four written questions targeting function, so students must connect structure to purpose, not just location. This is a natural fit for a human body unit study in grades 4 through 7, pairing well with lessons on the nervous system or senses.
Standalone, the lab sheet holds a full session: build, observe, draw, and reflect. Within a longer neuroscience sequence, it anchors the hands-on portion after reading-based introduction and before any assessment. By the time your homeschooler answers question four, asking what they learned from building, they have engaged with the material visually, tactilely, and in writing, demonstrating multi-modal understanding of how the brain is organized.
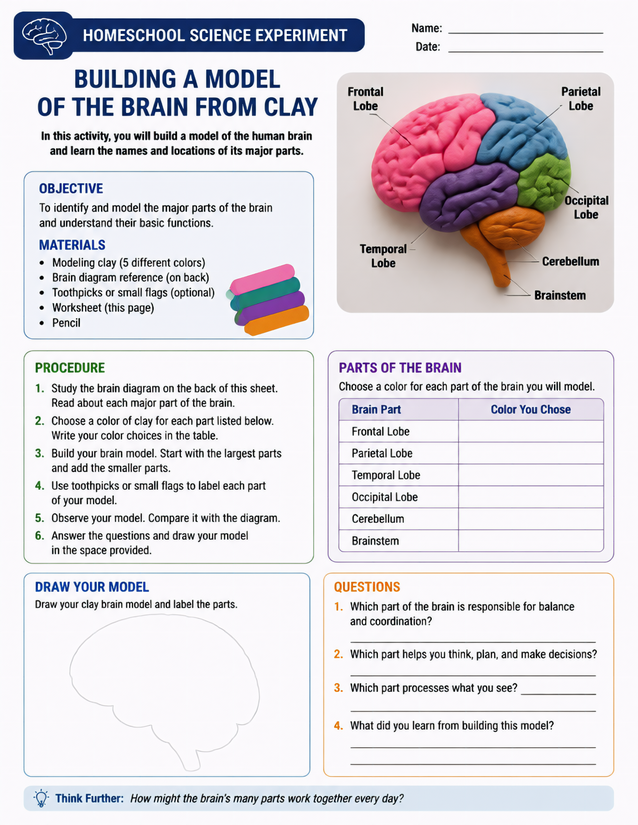
Grades 4 to 7 will love building a model of the brain from clay, labeling six major parts with color-coded precision. Instant download.
Getting Started with Building a Model of the Brain from Clay

Usage Notes
Five colors of modeling clay are the core supply, all widely available at craft stores or dollar sections. Toothpicks or small handmade flags label the finished regions, and the brain diagram reference prints on the back of this sheet. No specialty materials are required, though supervising younger students with toothpick labeling is worth noting.

Printing Tips
Eighty-pound cardstock keeps the worksheet flat under a working hand when your student is pressing clay and referencing the page at the same time. A loose sheet on a hard clipboard is the most practical setup, since the draw-your-model section needs firm backing for a clean sketch.