Creative Minds 𖹭 Happy Hearts

Building a Working Periscope with Mirrors, Lab Sheet
Mirrors, a cardboard box, and a specific angle are all it takes. Building a working periscope with mirrors is the kind of hands-on experiment your student will actually remember.
Your student starts by forming a hypothesis, then follows seven numbered build steps to cut openings in a shoebox, position two small flat mirrors at 45-degree angles, and light-proof the interior. The sheet guides grades 4 to 6 through the full scientific method, from the opening question (can I build a periscope that lets me see over or around objects using mirrors?) all the way to a written conclusion and an optional redesign challenge. Building a working periscope with mirrors sits comfortably in a light and optics unit study, and the diagram on the sheet explains the path light travels so your student understands why the angles matter, not just what to do.
The experiment works as a standalone session or as part of a broader physics sequence covering reflection and refraction. When your homeschooler completes the observation and conclusion sections, they demonstrate understanding of angle of incidence, light travel, and engineering iteration, skills that connect directly to physical science standards at this level. The optional challenge (can you make it smaller or use different materials?) gives advanced students a natural extension without requiring a separate worksheet.
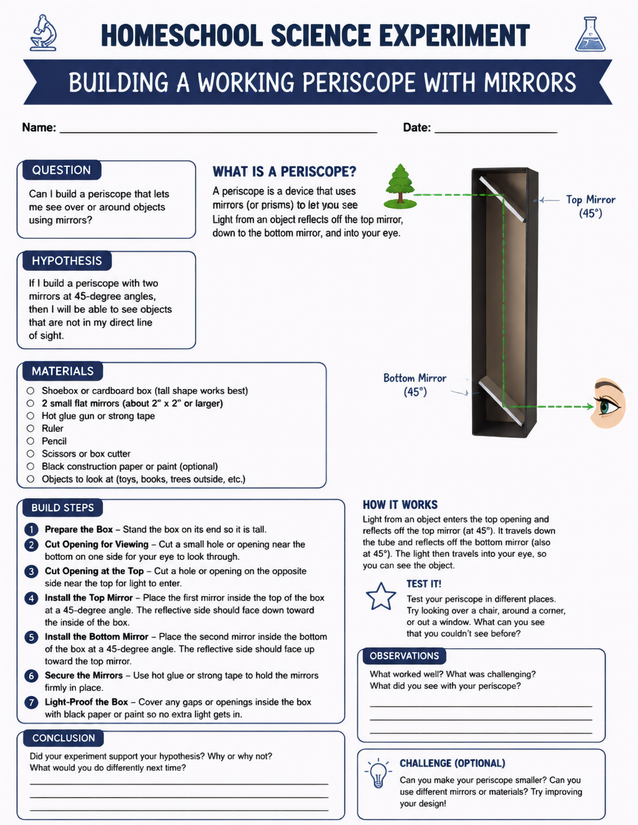
Grades 4 to 6 will love building a working periscope with mirrors angled at 45 degrees. Includes hypothesis, build steps, and observation prompts.
Setting Up Building a Working Periscope with Mirrors

Usage Notes
A shoebox or tall cardboard box forms the body of the periscope, and the sheet calls for two small flat mirrors, roughly 2 by 2 inches or larger. Hot glue or strong tape secures the mirrors, and black construction paper or paint covers any gaps. Everything on the list is a household or craft-store item, with no specialty science supplies required. Box cutters are listed for cutting the viewing holes, so parental supervision during that step is a practical safety note.

Printing Tips
Slip a single printed copy into a plastic page protector and clip it to a clipboard so your student can reference the diagram and build steps without the sheet getting bent or damp during construction. Card stock is not necessary here since students write in the observation and conclusion lines after building, not during it, but 24-pound paper holds up better than standard 20-pound if the sheet will sit on a workbench.