Creative Minds 𖹭 Happy Hearts

Water Cycle in a Bag Lab Sheet, Evaporation to Precipitation
Tape a bag of blue water to a sunny window and watch the water cycle run on its own. This water cycle in a bag lab sheet guides your student through every stage, from evaporation to precipitation, with questions that make the invisible visible.
Your student builds a sealed model of the water cycle in a bag using a gallon-size resealable bag, a quarter cup of water, and optional blue food coloring. Taped to a sunny window, the bag demonstrates evaporation as vapor rises, condensation as droplets form on the cooler upper surface, and precipitation as those droplets fall back into the water below. The observation section directs students to watch for all three stages, and a photo of a completed bag taped to a window gives a clear reference point. This sheet suits grades 3 to 5 and works equally well for a standalone earth science lesson or as a hands-on anchor activity inside a weather unit study.
Four think-and-answer questions close the lab, asking your homeschooler to explain what happened to the water over time, where condensation appeared, how droplets returned to the bottom, and how the bag model connects to the real water cycle on Earth. Completing those questions shows whether your student can apply observation to conceptual understanding, not just describe what they saw. The water cycle in a bag lab sheet works as a Charlotte Mason nature study tie-in or as a structured recording sheet inside a more formal homeschool science curriculum.
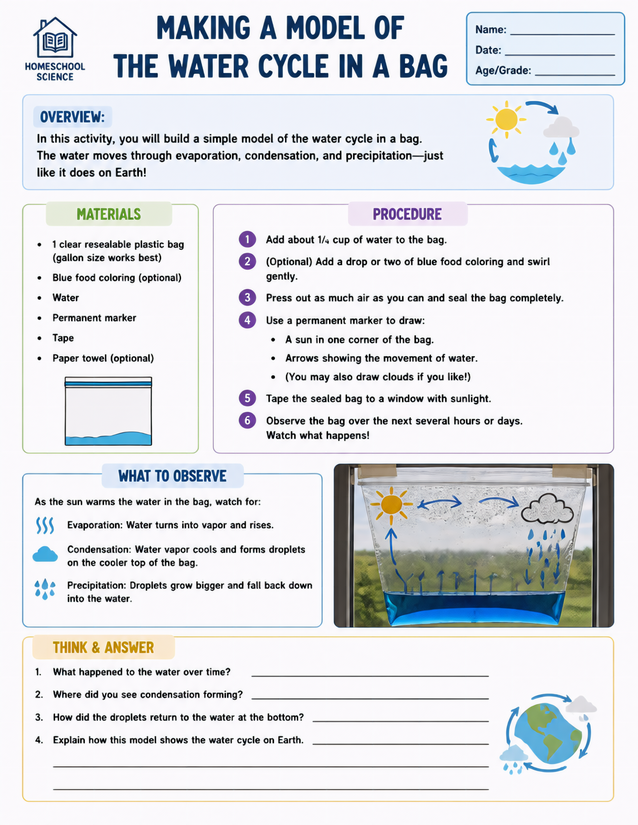
Grades 3-5 homeschoolers model evaporation, condensation, and precipitation using this water cycle in a bag lab sheet.
Investigating the Water Cycle in a Bag from Start to Finish

Usage Notes
Every material on this sheet is a household item. You need a gallon-size resealable plastic bag, water, tape, and a permanent marker. Blue food coloring is listed as optional but adds visual contrast that makes condensation droplets much easier for younger students to spot against the top of the bag. No heat source or safety equipment is required beyond keeping the permanent marker away from small children.

Printing Tips
A standard 20-lb copy sheet works fine here since students record answers after the experiment rather than writing during it. Slip the completed sheet into a three-ring lab notebook or keep it loose in a science folder alongside a photo your student takes of their bag on the window. Laminating is not recommended because the think-and-answer section requires written responses.