Creative Minds 𖹭 Happy Hearts

Observing Properties of Magnets and Magnetic Fields Lab Sheet
Five procedures, one sheet: observing properties of magnets and magnetic fields has never been this well organized for a homeschool science session. Your student records attraction tests, pole labels, repulsion behavior, iron filings patterns, and field line sketches all in one sitting.
This lab sheet walks your student through five sequential activities built around observing properties of magnets and magnetic fields. The first procedure has students bring a magnet near six specific objects, including a paper clip, iron nail, wood, plastic, glass, and a coin, recording yes or no in a structured attraction table. From there, your student uses a compass to identify North-seeking and South-seeking poles, then tests like and unlike pole behavior with two magnets. The final two procedures guide students through sprinkling iron filings over a sheet of paper to draw the field pattern, with an optional compass field map as an extension. This lab is well suited for grades 4 through 6 in a homeschool setting.
The sheet fits naturally into a physical science unit study on magnetism or electricity and magnetism. It works as a standalone one-session lab or as the opening experiment in a sequence on electromagnetic force. A completed sheet shows that your homeschooler can form a hypothesis, follow a multi-step procedure, record observational data in a table, produce a sketch from a physical phenomenon, and draw a conclusion that connects to a real-life example of magnetism.
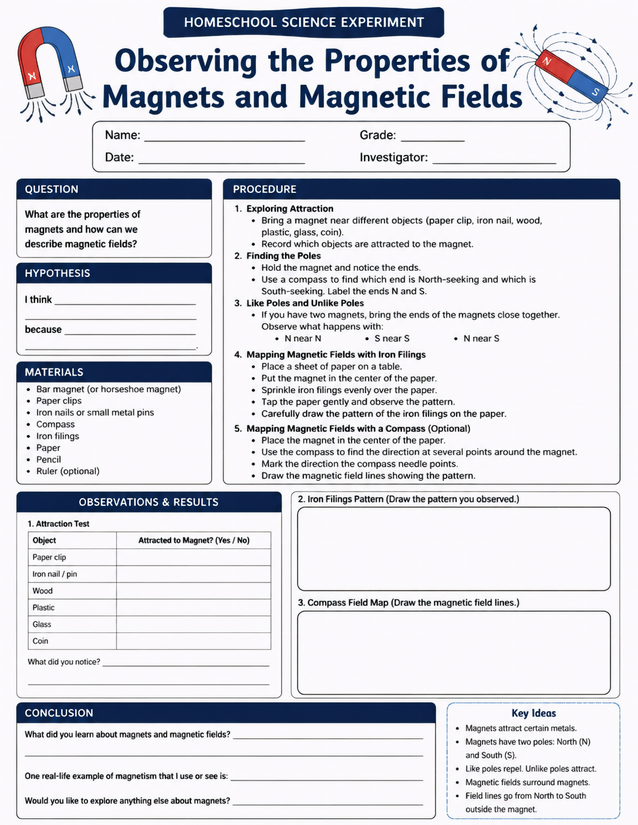
Grades 4-6 homeschoolers explore observing properties of magnets and magnetic fields through five hands-on procedures. Instant download included.
Setting Up Observing Properties of Magnets and Magnetic Fields

Usage Notes
Most materials on this sheet are household or low-cost items: paper clips, coins, wood scraps, and plastic pieces are listed alongside the magnet itself. Iron filings are the one specialty supply your student will need, and they should be handled carefully, kept away from eyes, and stored in a sealed container after the experiment. A compass is also required for the pole-identification and optional field-mapping steps.

Printing Tips
Standard 20 lb copy paper is fine for the attraction table and hypothesis sections, but the iron filings drawing box benefits from slightly heavier paper if your student is sketching with pencil pressure. Print one copy per student and insert it into a dedicated science lab notebook, or clip it to a clipboard for the hands-on portion and transfer it to the notebook once complete.