
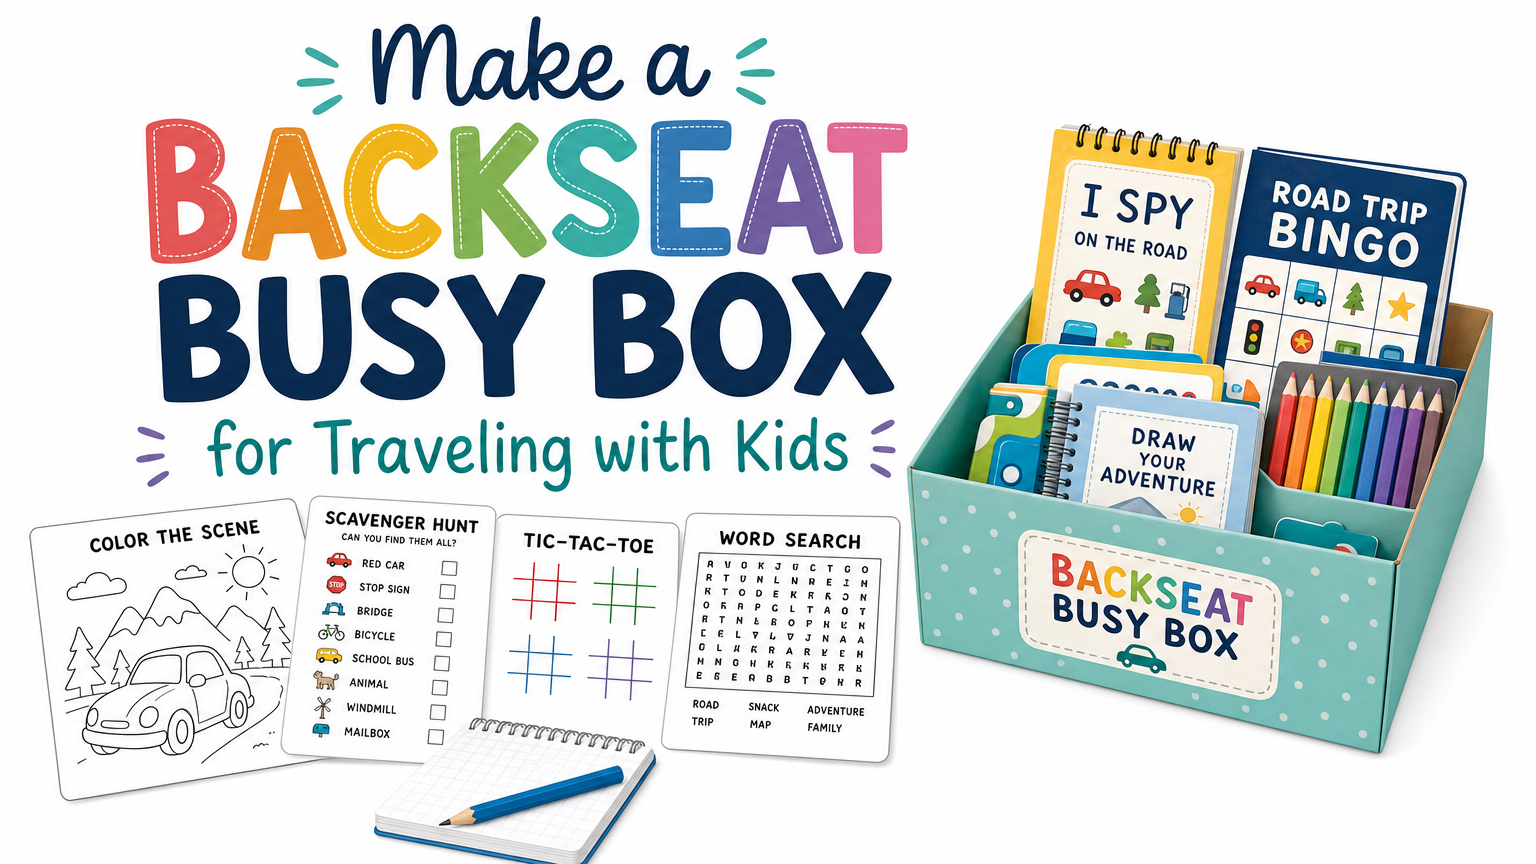
Road trips with kids are one of those things that can go beautifully or completely sideways, and the difference often comes down to whether little hands have something to do. A Busy Box is exactly what it sounds like: a self-contained activity kit that lives in the backseat and keeps your kids entertained, engaged, and (blessedly) quiet for stretches of the drive. The best part? You can put one together for next to nothing using free printables from elevatedprintables.com, a few supplies from the dollar store, and an afternoon of prep.
This guide walks you through everything, from picking the right container to loading it up with activities your kids will actually want to use.
What Is a Backseat Busy Box?
Think of it as a personal activity kit, sized for a child, designed to live within arm’s reach during a car ride. A good Busy Box keeps kids busy independently, which means you get to focus on driving instead of turning around every two minutes. It holds a curated mix of printable activities, small games, art supplies, and sensory items (fidget toys) that are all car friendly.
What You’ll Need
The Container
The container is more important than it sounds. You want something with a flat lid your child can use as a lap desk, enough depth to hold supplies without things getting lost, and a latch or closure that won’t pop open on its own.
Good options include:
- A pencil box with a hinged lid (great for younger kids or shorter trips).
- A small plastic storage box with a snap-shut lid.
- A handled craft storage box (the kind with a flip-up lid).
- A small plastic tote with a lid that fits snugly.
Dollar Tree and Five Below usually carry flat-lid storage boxes in exactly the right size range. Look for something around 12 inches by 8 inches, with a lid that’s smooth and firm enough to write on.
Supplies to Gather
You don’t need to spend a lot here. Most of this can come from the dollar section at Target, Dollar Tree, or things you already have at home.
For writing and coloring:
- A small pouch or zippered bag to hold pencils and markers.
- A pack of colored pencils (they don’t roll and bleed like markers can).
- A few washable markers if your kid is older and responsible with them.
- A couple of regular pencils with erasers.
- A small eraser.
For the printables:
- A small clipboard or a few sheets of cardboard slipped inside a plastic sleeve to give pages a firm backing.
- Page protectors (so you can slip laminated or sleeved sheets in and out easily).
- A small three-ring binder if you want to organize multiple pages.
Fun extras:
- Mini sticker sheets.
- A small spiral notebook for free drawing.
- Beeswax crayons or triangle crayons (they don’t roll).
- A few foam stickers for decorating finished pages.
- A small magnifying glass (some kids are fascinated with these).
- A pack of mini sticky notes.
Step One: Choose Your Printables
For toddlers and preschoolers (ages 2 to 5): Look for coloring pages with large, simple shapes. Dot-to-dot sheets with numbers up to 10 or 20 work really well because they give little ones a clear task with a visible payoff. Simple matching activities, color-by-number sheets with just a few sections, and tracing pages all land well for this age group.
For early elementary kids (ages 5 to 8): Mazes are a huge hit. Word searches with shorter, simpler word lists work great. Look for I Spy sheets, connect-the-dots with higher numbers, simple crosswords, and drawing prompts where kids follow step-by-step instructions to draw something.
For older kids (ages 9 and up): Longer word searches, more complex mazes, Mad Libs-style fill-in-the-blank sheets, trivia pages, brain teasers, and travel bingo all keep this age group busy without feeling babyish.
For everyone: Travel bingo is genuinely a gift for road trips regardless of age. Kids look for things out the window, check off their squares, and actually pay attention to what’s passing by. Grab a few different bingo cards so each person has a different one.
Also look for any road trip specific printables like scavenger hunt sheets, license plate trackers, state checklists, or “I Spy Out the Window” pages. These use the car ride itself as the activity.
How many pages to print: A good rule of thumb is to print about twice as many pages as you think you’ll need. Kids sometimes blast through activities faster than expected, especially in the first excited hour. For a six-hour drive, you might print 20 to 30 pages. For an overnight trip, go a little heavier.
Step Two: Print and Prep Your Pages
Once you’ve picked your printables, it’s time to print them out and get them ready.
Basic printing: Regular printer paper works fine for most activities. If you have cardstock, use it for anything the kids will be coloring heavily or any sheets you want to reuse.
Laminating for reuse: If you want to use the same sheets multiple times, which is great for bingo cards, mazes, and dot-to-dot pages, run them through a laminator or use self-seal laminating pouches. Once laminated, your kids can use dry-erase markers on the sheets and wipe them clean. This cuts down on how much you need to print and is more economical on longer trips.
Using page protectors: If you don’t have a laminator, slide printed sheets into clear page protectors. Kids can write on the outside of the protector with a dry-erase marker and wipe it clean. Not quite as durable as laminating, but it works.
Organize before you pack: Sort the pages by difficulty or by child if you have multiple kids. Paper clip or binder clip groups of pages together. If you’re making boxes for more than one child, keep each kid’s pages in a separate stack so there’s no fighting over who gets what.
Step Three: Assemble the Box
Now for the satisfying part. Lay everything out before you start packing so you can see what you have and make sure it all fits.
Pack the bottom layer first: Place the flat items first: your stack of printable pages, the small notebook, and any sticker sheets. If you’re using a clipboard, slip it in here too.
Add a supply pouch: Drop in a small zippered pencil pouch with your colored pencils, a couple of pencils, and an eraser. Keeping supplies in a pouch (rather than loose) makes it so much easier for kids to grab what they need without dumping everything out.
Layer in the extras: Tuck in the foam stickers, sticky notes, mini magnifying glass, or whatever extras you’ve chosen. Try to keep heavier items toward the edges so the box stays balanced on a lap.
Check the lid: Close the box and make sure the lid shuts properly. Nothing derails a road trip faster than a box that won’t close and has pencils sliding everywhere.
Add a label: Stick a piece of masking tape on the lid and write your child’s name or draw a simple picture. Kids love having something that’s clearly theirs. If you want to get fancy, elevatedprintables.com may have label templates you can print and cut out to stick on the front.
Step Four: Introduce the Box Before the Trip
Don’t just hand the box over the moment you pull out of the driveway. Do a quick “reveal” the night before or the morning of the trip. Let your child open it, flip through the pages, pick out their favorite colored pencil. This builds anticipation and makes it feel like a treat rather than an afterthought.
You might also do a short test run where you explain the ground rules:
Keeping it simple works best. The point is that this is theirs, and they’re in charge of it.
Step Five: Set It Up in the Car
Where and how the box sits in the car matters. A few tips to make it work well:
On the lap: For kids old enough to manage it, the box can sit on their lap with the lid open, acting as a little desk. Flat-lid boxes work especially well for this.
In a car organizer: If you have a backseat organizer that hangs from the headrest, the box can sit in one of the pockets and kids reach in when they want it.
In the seat pocket: Smaller boxes slide right into the pocket on the back of the front seat, keeping the floor clear.
In a tote between car seats: If you have two kids in car seats, a small tote bag between them can hold both boxes and makes it easy for each child to reach their own.
One thing to think about: dry-erase markers need to be recapped or they dry out fast. If your kid is doing laminated sheets, keep a small zipper bag just for the markers and the eraser so they stay together.
Tips for Making It Last the Whole Trip
A Busy Box lives or dies by pacing. If kids blow through everything in the first hour, you’ll still have hours to go. Here’s how to stretch it out:
Introduce activities in waves. Hand over the box at the start of the trip, but hold back a few pages or a special sticker pack in your own bag. When energy flags or moods dip, pull out the “bonus round.” Kids respond to novelty, and even a page they haven’t seen yet can reset the mood.
Pair the box with other activities. The box doesn’t have to be the only thing going on. Alternate between box time and an audiobook, a family car game, or even a designated “look out the window” stretch where everyone finds five things that are a certain color.
Refill it for the return trip. Before you head home, print a fresh batch of pages or pull out any blank notebook pages. Swap out anything that got used up. A refreshed box for the drive home feels like a completely new treat.
Swap with siblings. If you have two kids with different boxes, they might love trading for a 20-minute stretch. Different activities, fresh energy.
Customizing for Your Child’s Interests
The printables at elevatedprintables.com cover a wide range of themes, so if your kid is obsessed with dinosaurs, space, animals, or unicorns, look for pages that match those interests. A kid who loves dinosaurs is going to stay busy longer with a dinosaur coloring page than with a generic one.
You can also personalize the box itself:
- Let your child decorate the lid before the trip.
- Add a mini photo of your destination tucked inside to add eager anticipation. Or, if your child is prone to anxiety over the unfamiliar, it’ll help having a glimpse of what to expect.
- Include a tiny toy or trinket that matches the trip theme (a small seashell if you’re headed to the beach, a mini animal figure if you’re visiting a zoo).
These small touches turn a practical tool into something they’ll actually look forward to.
Making Multiple Boxes for Multiple Kids
If you’ve got two or more kids to manage, make a separate box for each child rather than one shared box. Sharing sounds efficient but almost always leads to arguments about who had which colored pencil or whose turn it is with the cool maze.
Pick a different color box for each kid if you can, or use different colored pouches inside so it’s obvious whose supplies are whose. Print slightly different pages for each child based on their age and interests. The older kid gets the harder maze; the younger one gets the simpler coloring page. Keeping things personalized cuts down on the “that’s not fair” factor significantly.
A Sample Busy Box Setup
To give you a concrete picture, here’s what a solid box for a 6-year-old might look like:
- 5 coloring pages of characters or themes they love.
- 3 maze pages of varying difficulty.
- A couple of dot-to-dot pages.
- A travel bingo card that’s either laminated to use with a washable marker or stickers.
- I Spy out the window sheet.
- Some drawing prompts.
- A pack of colored pencils in a small zipper pouch.
- Pencil.
- Eraser.
- A dry-erase marker and a small cloth eraser for the laminated bingo card.
- A sheet or two of fun stickers as a reward for finishing activities.
- A small notebook for free drawing.
That whole box, filled with printables from elevatedprintables.com and supplies from the dollar store, will run you less than five dollars per child. And the payoff in peaceful driving time is absolutely worth it.
Final Thoughts Before You Hit the Road
The beauty of a Busy Box is that it grows with your kids. Every trip is a chance to refresh the printables, swap in new activities, and keep things feeling current. What works for a 4-year-old won’t work when they’re 7, and that’s fine. Keep the box, update the contents, and you’ve got a system that travels well for years.
Print a few extra pages to stash in your own bag. Keep a spare pencil in the glove compartment. And give yourself a well-deserved pat on the back for putting this together ahead of time. It’s one of the smartest things you can do for your sanity on a long drive. Your kids will be happily busy, you’ll be calm, and the miles will pass a lot more easily than you expected. Instead of “are we there yet?” you just might hear “wow! We’re there already?!”
Wishing you safe & happy traveling!