Creative Minds 𖹭 Happy Hearts

Building a Model of the Human Eye, Homeschool Science Lab Sheet
A plastic bottle, a cup, some water, and a flashlight are all it takes to see exactly how your eye bends light. Building a model of the human eye has never been this tangible or this clever.
Your student constructs a working eye model from a clear 500 mL bottle filled with water, a small plastic cup serving as the lens, plastic wrap, black construction paper, and a strip of white paper as the retina. The lab sheet walks through an eight-step procedure and then asks four observation questions, including whether the image on the retina appears right-side up or upside down and what changes when the lens moves closer or farther. It suits grades 3 to 6 and connects directly to life science standards covering light, optics, and sensory systems.
Building a model of the human eye works as a standalone lesson or as the hands-on anchor of a unit study on the senses, light and optics, or human biology. The Think and Explain section pushes your homeschooler past observation into reasoning, asking them to name which bottle part represents the cornea, the pupil, the lens, and the retina. A fun fact panel about lens accommodation gives an easy extension discussion for older students, and the background paragraph gives younger students enough context to understand the camera analogy before they build anything.
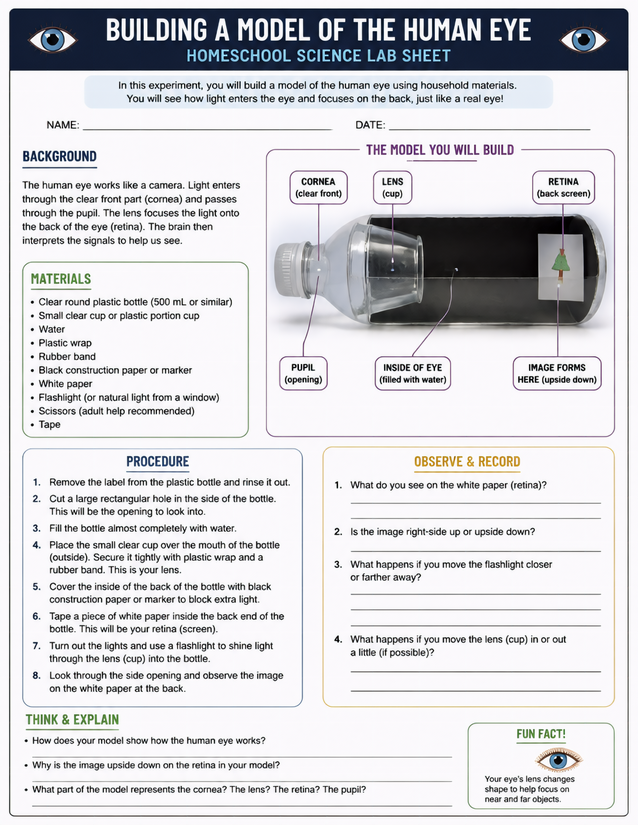
Grades 3 to 6 homeschoolers explore optics hands-on: building a model of the human eye using a water-filled bottle, a cup lens, and white paper retina.
Investigating Building a Model of the Human Eye

Usage Notes
Nearly every item on the materials list is a household staple: a clear plastic bottle, a small cup, water, plastic wrap, a rubber band, black construction paper or a marker, white paper, and tape. A flashlight completes the setup. Scissors are the only tool that warrants the sheet’s own note recommending adult help for younger students.

Printing Tips
Slip this sheet into a plastic page protector inside your homeschool science binder so the procedure stays dry while your student works near the water-filled bottle. For recording, print a second clean copy on standard 20 lb paper and keep it on a clipboard away from the experiment.