Creative Minds 𖹭 Happy Hearts

Building a Model of the Respiratory System, Diaphragm Focus
Pull down on a balloon and watch two smaller balloons inflate inside a bottle. Building a model of the respiratory system turns an abstract biology concept into something your student can hold in one hand.
Building a model of the respiratory system asks your student to construct a working lung model from a clear plastic bottle, a Y-shaped straw connector, two small balloons representing the lungs, and a large balloon stretched across the cut bottom to stand in for the diaphragm. The sheet walks through a seven-step procedure, a hypothesis section, and two specific observation prompts: what happens to the lung balloons when the diaphragm balloon is pulled down, and what happens when it is pushed up. This lab is well-suited for grades 4 to 6 and targets the core question of how diaphragm movement drives inhalation and exhalation.
The recording sheet fits cleanly into a human body unit study, pairing naturally with lessons on the circulatory system or gas exchange. A student who completes the observations and conclusion can articulate the mechanical relationship between the diaphragm and lung volume, which is a measurable outcome for any life science scope and sequence. The Think Further prompt, asking how exercise affects breathing rate, gives your homeschooler an easy bridge into a follow-up investigation.
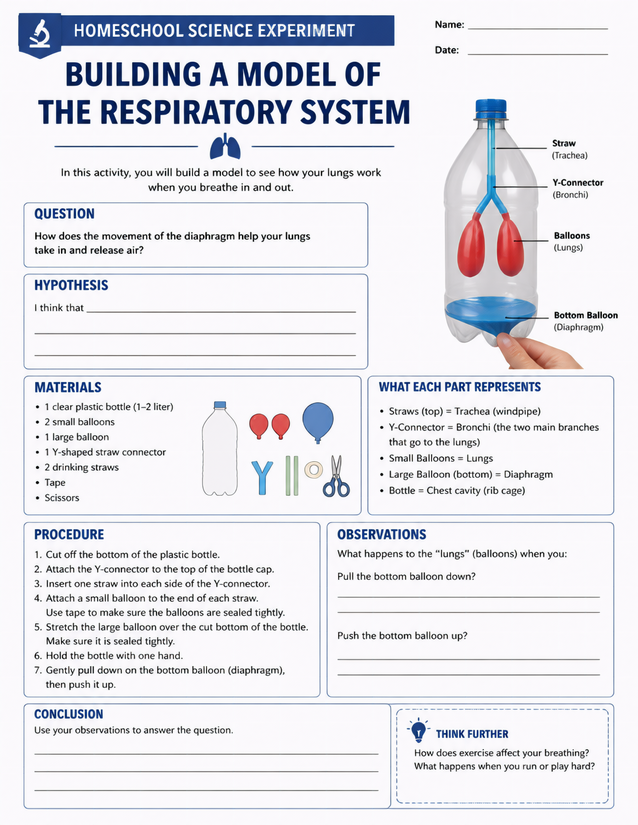
Grades 4 to 6 homeschoolers explore lung mechanics hands-on. Building a model of the respiratory system uses everyday household supplies.
Investigating Building a Model of the Respiratory System

Usage Notes
Scissors are on the materials list, and step one involves cutting the bottom off a plastic bottle, so supervise younger students during that step. The Y-connector is the one specialty item here since it is not always in every household, but it is inexpensive and widely available at hardware or craft stores. Everything else, including tape, drinking straws, and balloons, is standard household stock.

Printing Tips
Sixty-pound or heavier paper holds up better when students are writing observations mid-experiment with slightly damp or messy hands. A loose sheet on a clipboard keeps the instructions visible while the model is being assembled on a separate work surface.