Creative Minds 𖹭 Happy Hearts

Building a Model Power Plant, Showing How Electricity Is Generated
Cardboard, a drinking straw, a paper wheel, and a small motor are all your student needs for building a model power plant that actually lights an LED.
Building a model power plant walks grades 4 to 6 students through the five-step energy conversion sequence a real power plant uses: heat source, steam production, turbine rotation, generator action, and finally powering a light. The lab sheet provides the guiding question, a labeled diagram of all five steps, a seven-step procedure, and lined sections for observations and conclusions. Your student builds each component from household materials and wires them together so the circuit is complete enough to test.
This experiment fits naturally into an energy unit study or a physics block on electricity and energy transfer. It works as a standalone session or as a capstone after lessons on circuits and generators. When your homeschooler finishes building a model power plant and records observations about what happens at each step, they demonstrate understanding of energy conversion, simple circuits, and the relationship between mechanical motion and electrical output.
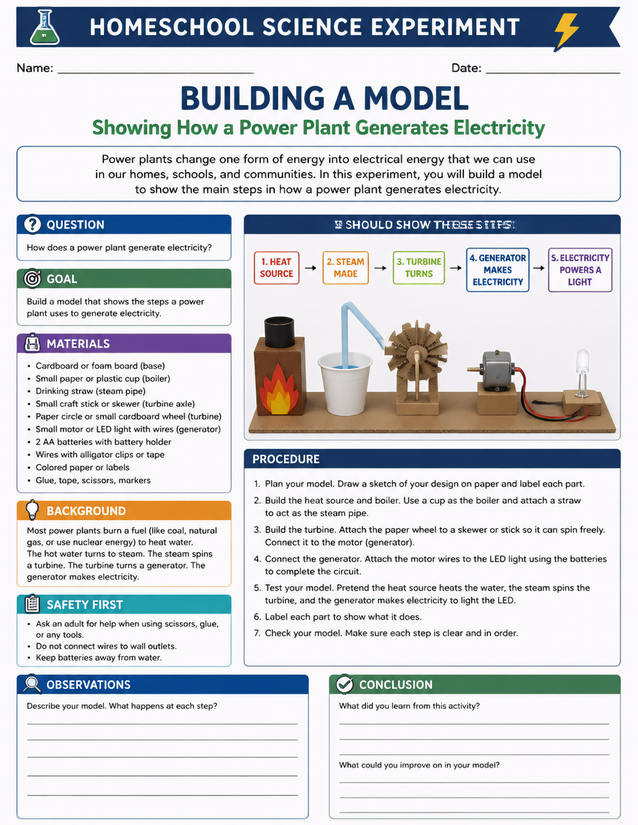
Grades 4 to 6 homeschoolers explore building a model power plant using cardboard, a motor, and an LED light. Instant download.
Getting Started with Building a Model Power Plant

Usage Notes
Cardboard or foam board forms the base, and the sheet calls for a small motor or LED light with wires, two AA batteries with a battery holder, and wires with alligator clips or tape. Nearly all supplies are household or craft-drawer items, though the small motor and battery holder may require a quick hardware or hobby store order. Safety notes on the sheet flag scissors, glue, and tools as adult-assist items, and remind students to keep batteries away from water and never connect wires to wall outlets.

Printing Tips
Regular 20-pound copy paper works fine here since students are writing observations and labeling a diagram rather than cutting the sheet itself. Clip it to a clipboard so it stays flat while your student moves between building steps, or three-hole punch it to live inside a science lab notebook alongside the sketch they draw in step one.