Creative Minds 𖹭 Happy Hearts

Carbon Cycle Combustion and Photosynthesis Lab Sheet
Two jars, a candle, and a sprig of Elodea make the carbon cycle visible in under an hour. This carbon cycle combustion and photosynthesis lab gives your student a concrete way to see CO2 released and recaptured in real time.
Your student sets up two sealed jars side by side: one with a burning tea light releasing carbon dioxide through combustion, and one with an aquatic Elodea plant absorbing that CO2 through photosynthesis. The sheet walks through the full procedure, including a baking soda and vinegar reaction to generate CO2 for the plant jar, then asks students in grades 5-8 to record observations across four prompts comparing what happened in each jar over a 30-to-60-minute window.
The carbon cycle combustion and photosynthesis lab works well as a standalone lesson or as the hands-on anchor for a broader earth science or ecology unit study. By the time your homeschooler fills in the conclusion and Think Further sections, they have articulated how combustion and photosynthesis balance each other in the carbon cycle and begun reasoning about what happens when that balance is disrupted.
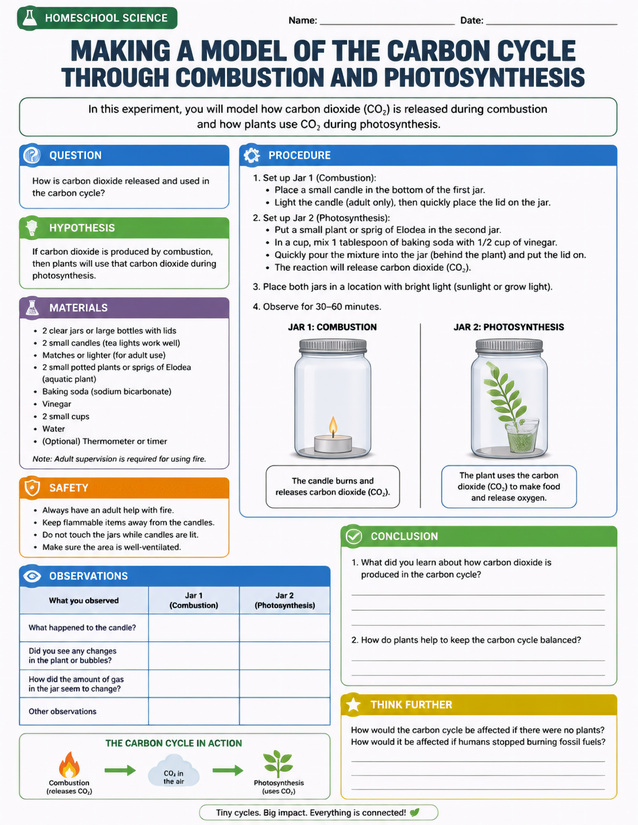
Model CO2 release and uptake with this carbon cycle combustion and photosynthesis lab, suited for grades 5-8 homeschoolers. Download free today.
Setting Up the Carbon Cycle Combustion and Photosynthesis Lab

Usage Notes
Most materials here are household items: two wide-mouth jars with lids, tea light candles, baking soda, vinegar, and water. The one specialty item is Elodea, an aquatic plant available at most pet stores in the fish section. Adult supervision is required for the candle step, and the sheet calls this out explicitly in both the materials list and a dedicated safety section.

Printing Tips
Printing on 24 lb paper is fine, but the observation table has multiple write-in cells that benefit from a slightly heavier 28 lb sheet if students press hard. Slip it into a plastic sheet protector inside a lab binder so the safety notes stay visible while students work with open flames and liquids nearby.