Creative Minds 𖹭 Happy Hearts

Making a Compass with a Magnetized Needle, Homeschool Science Experiment
A sewing needle, a bar magnet, and a bowl of water are all it takes. Making a compass with a magnetized needle shows your student exactly why Earth itself acts like a giant magnet.
Making a compass with a magnetized needle is a hands-on magnetism lesson well suited for grades 3 through 6. The sheet walks students through stroking the needle with a bar magnet 20 to 30 times to build a magnetic charge, threading it through a cork float, and setting it on still water to observe which direction it settles. The observations table asks students to record which direction the needle pointed, whether it repeated consistently after the dish was turned, and to draw or describe what they saw.
This experiment works as a standalone introduction to Earth’s magnetic field or as part of a broader unit study on navigation, magnetism, or physical science. The Think and Reflect section pushes students to connect the homemade instrument to a store-bought compass and to brainstorm real-world uses, demonstrating that they understand magnetic north as a concept rather than just a result.
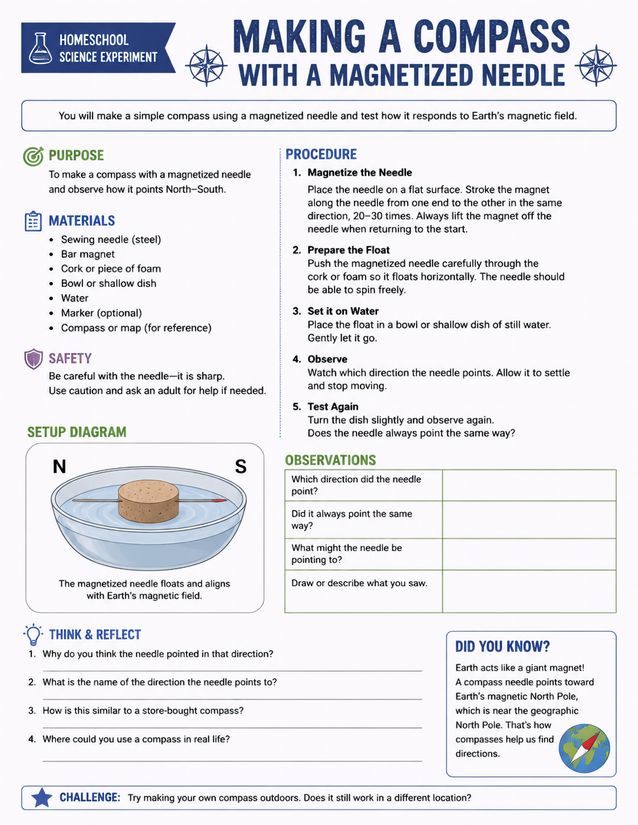
Grades 3-6 homeschool science: making a compass with a magnetized needle using cork, a bowl, and a bar magnet. Instant download.
Getting Started with Making a Compass with a Magnetized Needle

Usage Notes
Nearly every supply on the materials list is already in most homes: a sewing needle, a bar magnet, cork or foam scraps, a bowl, and water. A compass or map is listed as a reference item, not a required tool. The sheet flags a clear safety note: the needle is sharp, and younger students should have an adult present when handling it.

Printing Tips
Standard 20-pound copy paper works fine here since students write in the observations table after the experiment rather than during wet or messy steps. A loose sheet on a clipboard keeps the page accessible while students move between the bowl and their writing surface, and it slips easily into a lab notebook afterward.