Creative Minds 𖹭 Happy Hearts

Making a Model of the Human Digestive System, Grades 4-6
Bread, yogurt, and a sock walk into a bottle and suddenly your student understands exactly how the digestive system works. Making a model of the human digestive system turns an abstract process into something they can squeeze and watch.
Making a model of the human digestive system is the centerpiece of this hands-on lab sheet designed for grades 4 to 6. Your student builds a working physical model using a 2-liter plastic bottle as the stomach and large intestine, a funnel as the mouth and esophagus, and a knotted pantyhose or sock as the small intestine. A mushy mixture of bread, yogurt, oil, and water stands in for partially digested food, and the sheet guides students through six numbered procedure steps before asking them to record observations and answer three discussion questions about the stomach’s job, small intestine function, and why nutrient breakdown matters.
This lab fits naturally into a human body unit study at the middle elementary level and works as a standalone session or as one experiment in a systems-of-the-body sequence. By the time your homeschooler completes the observation and think-and-discuss sections, they have physically demonstrated how food moves from mouth to large intestine and can articulate what each organ does. An extension prompt on the sheet encourages further research into accessory organs like the liver or pancreas, making it easy to stretch the lesson across additional days.
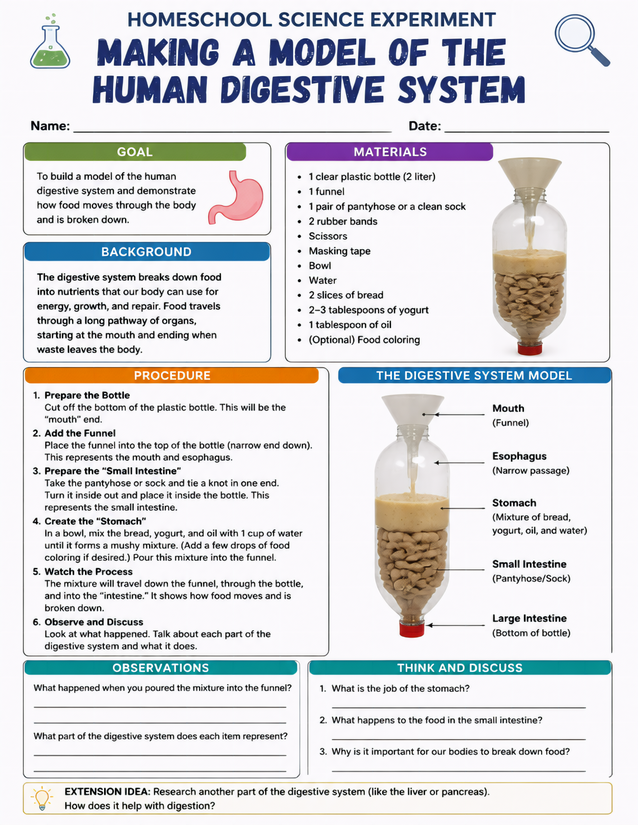
Bread, yogurt, and a plastic bottle bring making a model of the human digestive system to life for grades 4-6 homeschoolers.
Investigating Making a Model of the Human Digestive System

Usage Notes
Most materials here are household items your kitchen likely already has: a 2-liter bottle, a funnel, rubber bands, scissors, masking tape, a bowl, water, bread, yogurt, and oil. The one slightly unusual item is a pair of pantyhose or a clean sock to represent the small intestine. Scissors are required for cutting the bottom off the plastic bottle, so plan to supervise that step with younger students.

Printing Tips
Twenty-pound copy paper works fine for this sheet since students fill in observations after the experiment rather than writing while their hands are messy. Slip it into a plastic page protector inside a lab notebook, or keep it as a loose sheet on a clipboard nearby during the build so your student can reference the procedure steps without worrying about spills.