Creative Minds 𖹭 Happy Hearts

Making a Model of the Water Table, Groundwater Experiment
Layers of gravel, sand, and topsoil inside a clear container reveal exactly where groundwater collects. Making a model of the water table turns an invisible phenomenon into something your student can actually watch form.
Making a model of the water table walks middle and high school students through building a scaled cross-section of underground geology inside a clear plastic container. Your student layers rocks or gravel, sand, and topsoil, then slowly adds water with a spray bottle while observing where saturation occurs and where the water table line becomes visible. The sheet records three specific observations: what happened as water was added, where the water collected, and which layer stopped its downward movement. Four written questions push students to connect the model to real-world groundwater systems, including what happens when more water is added and how wells access water underground.
This lab fits naturally into an earth science or physical geography unit study, particularly when paired with lessons on aquifers, the water cycle, or soil permeability. It works as a standalone hands-on session or as one experiment in a broader groundwater sequence. A student who completes it can explain what an impermeable layer does, describe the conditions that create a water table, and articulate why drought lowers groundwater levels, demonstrated through the conclusion and think-further prompt on the sheet.
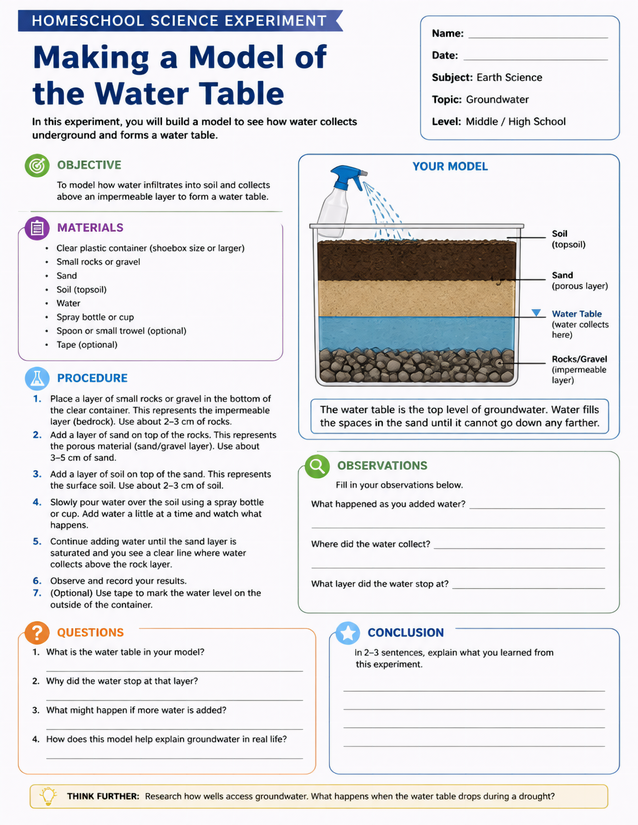
Hands-on groundwater unit study for middle and high school: making a model of the water table uses household materials and records real observations.
Investigating Making a Model of the Water Table Step by Step

Usage Notes
Every material on this list is a household or hardware store item: a clear shoebox-size container, small rocks or gravel, sand, topsoil, and a spray bottle or cup. No specialty science supplies are needed. Water is added slowly in step four, so spills are possible; working on a tray or outside is worth mentioning to your student before setup begins.

Printing Tips
A 24-lb or heavier copy paper handles the pencil and pen writing in the observations and conclusion sections better than standard 20-lb stock. Slip the sheet into a plastic page protector inside a lab notebook so it stays flat during the experiment, when wet hands are common.