Creative Minds 𖹭 Happy Hearts

Making a Pinhole Camera with a Box, Six-Step Lab Sheet
Flip the world upside down with a shoebox. Making a pinhole camera with a box shows your student exactly why light travels in straight lines and what happens when those lines cross.
Making a pinhole camera with a box is an optics experiment suited for grades 4-7. The sheet opens with a background section explaining how light rays enter a tiny hole and project an inverted image on the opposite wall, then walks students through six illustrated steps: sealing one end with black paper, covering the other with aluminum foil, poking a pinhole in the foil, taping white or tracing paper inside, pointing the camera at a bright scene, and observing the result. Observation prompts ask students to describe the image, confirm whether it appears upside down, and test what changes when the pinhole is made larger. A draw-your-result box asks students to sketch the inverted scene they see.
This lab fits naturally into a light and optics unit study or a broader physics sequence covering how cameras and the human eye work on the same principle. It works as a standalone session or as an anchor activity before introducing lenses. Students demonstrate understanding of rectilinear light propagation and image inversion by completing the observation and conclusion sections, and a challenge prompt pushes curious learners to test a smaller pinhole and explain the difference.
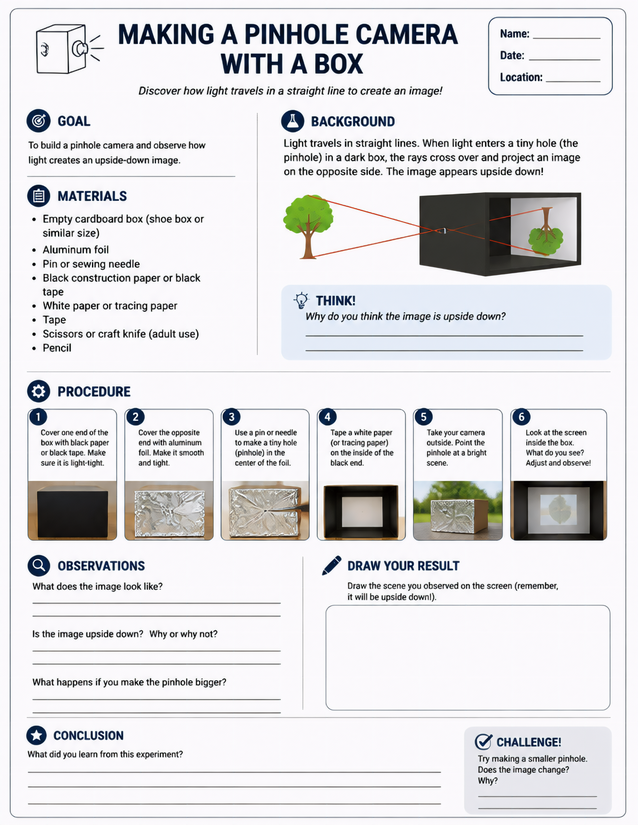
Grades 4-7 homeschoolers explore how light travels by making a pinhole camera with a box using household supplies.
Getting Started with Making a Pinhole Camera with a Box

Usage Notes
Every material on the list is a household item: a shoe box, aluminum foil, a pin or sewing needle, black construction paper or black tape, white or tracing paper, tape, scissors or a craft knife, and a pencil. Adult supervision is recommended for the craft knife step, which the sheet flags as adult use. No specialty supplies are needed, making this easy to prep in under ten minutes.

Printing Tips
Cardstock at 65 lb gives the sheet enough body to rest flat on a table while students work with their boxes alongside it. Slip it into a plastic page protector if you want to reuse the observation section with a dry-erase marker across multiple trials or siblings.