Creative Minds 𖹭 Happy Hearts

Making a Simple Microscope with a Water Drop, Homeschool Lab Sheet
A single water drop stretched over plastic wrap becomes a working lens your student builds in minutes. Making a simple microscope with a water drop is one of those experiments that genuinely surprises kids the first time they look through it.
Making a simple microscope with a water drop teaches light refraction in a way grades 2-5 students can see and feel immediately. The sheet walks your homeschooler through cutting a hole in an index card or cardstock, stretching plastic wrap tightly across it, placing one small dome-shaped drop of water in the center, and then holding the card above a small object like an ant, printed text, a plant leaf, fabric, or sand to observe magnification. A labeled diagram shows exactly how the water drop bends light downward toward the object below, and an open observations box gives your student space to draw or describe what they see. Four reflection questions push further: which objects worked best, how moving the card changed the view, what a larger drop might do, and how this compares to a real microscope.
This lab fits naturally into a unit study on light and optics, simple tools and technology, or the history of science and early microscopy. It works as a standalone session or as an opener before introducing compound microscopes. Your student demonstrates an understanding of refraction, lens shape, and focal distance by completing the procedure and answering the reflection questions, making it a strong addition to a science portfolio for this grade range.
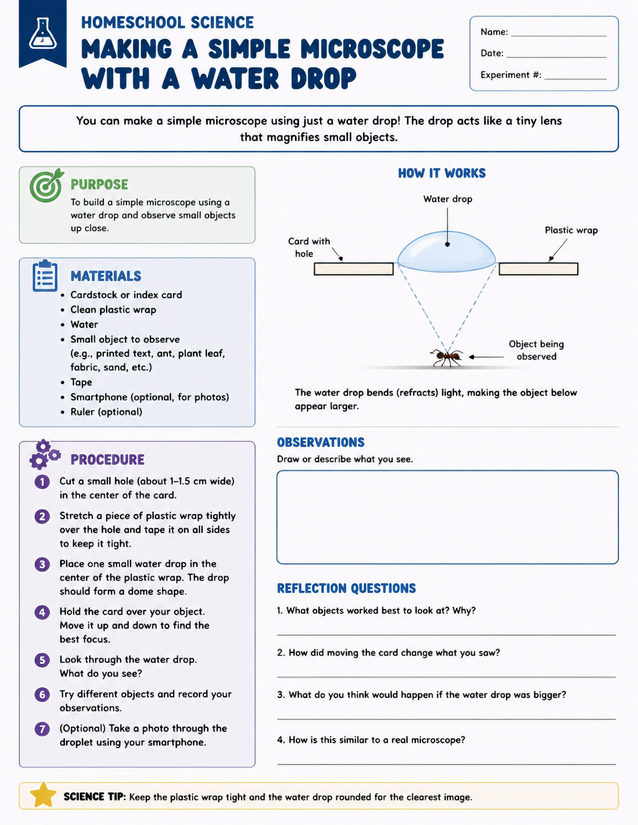
Grades 2-5 homeschoolers explore light refraction by making a simple microscope with a water drop using household supplies.
Getting Started with Making a Simple Microscope with a Water Drop

Usage Notes
Every material on this sheet is a genuine household item. Cardstock or an index card, clean plastic wrap, tape, water, and a small object to observe are all you need, with a ruler and smartphone listed as optional additions. The only setup caution worth noting before your student begins is keeping the plastic wrap taut on all sides before placing the drop, because a loose surface will distort the dome shape and reduce magnification.

Printing Tips
Copy paper at 20 lb works fine here since the writing load is light, but 24-lb paper holds up better if your student is writing during the experiment rather than after. Print one sheet per experiment session and keep it loose for easy reference on a desk or table beside the materials, or punch and insert it into a science lab notebook once observations and reflection questions are complete.