Creative Minds 𖹭 Happy Hearts

Making a Simple Pendulum Clock, Homeschool Science Lab Sheet
Swing length controls time, and making a simple pendulum clock is exactly how your student proves it, measuring periods across three trials to find the magic one-second swing.
Making a simple pendulum clock puts the physics of periodic motion directly in your student’s hands. The lab sheet walks grades 4 through 7 through six assembly steps, from attaching a wooden dowel vertically to a base board and threading string through an eye screw, to mounting a printable clock face and cutting a cardboard pointer. Students begin with a pendulum length of 12 to 16 inches from pivot to bob, swing 20 times, and record the time per swing across three separate trials in the built-in data table.
The challenge question at the bottom raises the stakes: can your homeschooler adjust the pendulum until 20 swings land as close to 20 seconds as possible, hitting exactly one second per swing? That single goal makes this lab fit naturally into a physics unit study on force and motion, or as a standalone investigation into how mechanical clocks work. By the time your student answers all three think-and-explain questions, they can articulate why longer pendulums swing slower and why that consistency made pendulum clocks the world’s most accurate timekeepers for two centuries.
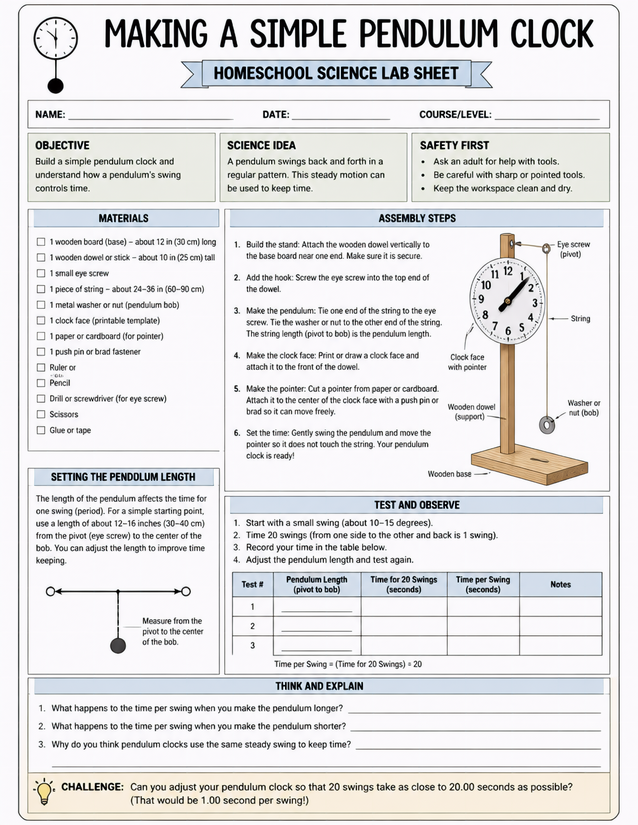
Grades 4-7 homeschoolers explore pendulum physics by making a simple pendulum clock with household materials. Includes assembly steps and data table.
Setting Up Making a Simple Pendulum Clock in Your Homeschool Lab

Usage Notes
Most materials here are household items: a wooden board for the base, a dowel or sturdy stick, string, and a metal washer or nut as the pendulum bob. The one specialty item is the small eye screw, available at any hardware store for under a dollar. The safety section on the sheet flags sharp tools and the drill or screwdriver needed for the eye screw, so plan to handle that step yourself before handing the build over to your student.

Printing Tips
Twenty-four-pound paper gives the data table enough body to write on firmly during the timing trials without the sheet shifting on a clipboard. Loose on a clipboard works well here since your student will be moving around the build, but the sheet can also be hole-punched and added to a physics unit study binder after the experiment is complete.